
You can connect try-on in roughly 5–7 steps. You need three things to start: clean packshots (ideally on white), an integration format, and about 1–2 hours for setup. Many apparel stores pilot 20–30% of SKUs and read conversion impact within 2–4 weeks.
Why a try-on widget on the site
Returning one apparel unit often costs a store about $6–18 all-in (two-way shipping, inspection, repack, warehouse touches). At 30–40% return rates common in fashion, that is direct margin leakage.
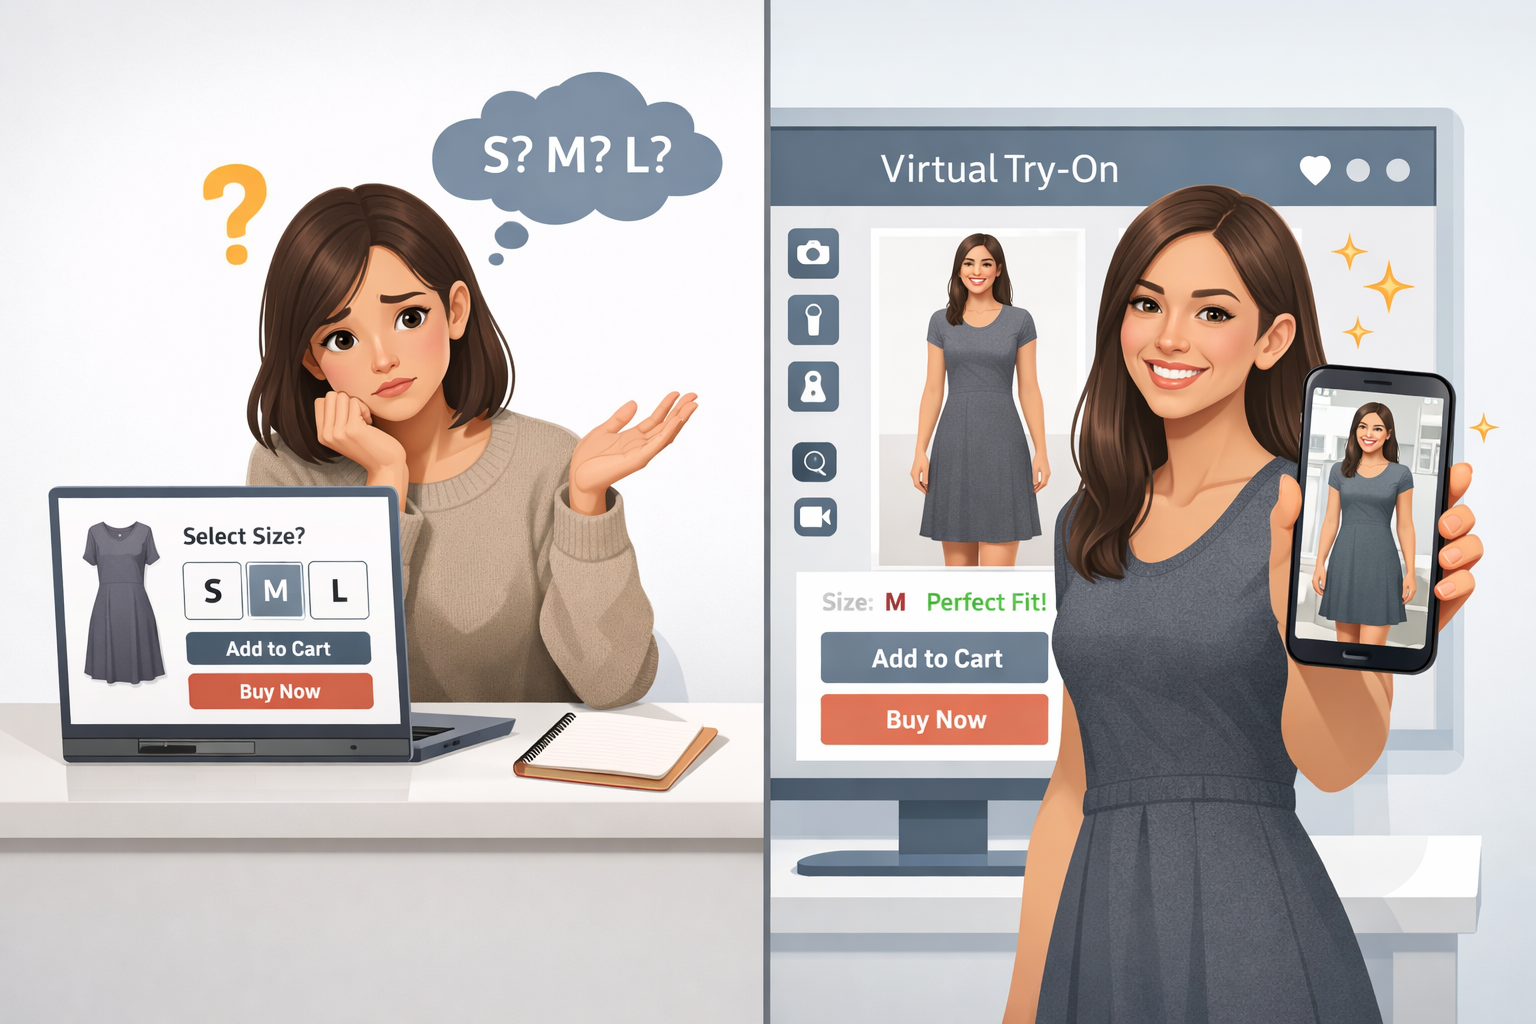
Without try-on, shoppers order multiple sizes or bounce. PDP conversion in fashion without sizing tools often sits around 1.5–3%; with virtual try-on, 3–6% is a realistic band.
Virtual try-on tackles both: shoppers see fit before checkout, pick one size, return less—while you cut logistics cost and protect revenue.
This is arithmetic, not hype: a 20–30% drop in returns on ~1,000 monthly orders and a ~$65 average cart can free thousands of dollars per month in fulfillment alone.
Three integration shapes: widget, iframe, API
Pick a format before you wire anything:
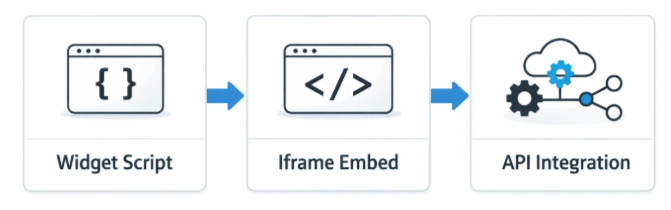
Script widget. One snippet in the PDP template. Works on most CMS (Tilda, WordPress, Bitrix, custom). No developer required if you can edit templates. Trade-off: limited visual customization.
iframe embed. Try-on loads in a frame on the product page. Slightly more layout control; you need basic HTML comfort (~15 minutes if you know where to paste).
API integration. Full control of UX, events, and downstream analytics. Requires engineering—typically days to a couple of weeks.
| Parameter | Widget | iframe | API |
|---|---|---|---|
| Time to connect | 10–30 min | 15–60 min | 2–14 days |
| Developer needed | No | Minimal | Yes |
| Customization | Low | Medium | Full |
| Analytics depth | Basic | Basic | Full funnel |
| CRM tie-in | No | No | Yes |
If unsure, start with the widget; you can graduate to API after the pilot proves value.
Step-by-step: rolling out online try-on
1. Choose format (widget for speed, API for deep integration).
2. Prepare catalog imagery—most delays are photos, not code.
3. Upload catalog to the provider (images, size chart, SKUs)—often a few hours for 50–100 SKUs.
4. Tune UI: button color, placement, CTA copy.
5. Install code on the PDP (script, iframe block, or API per docs).
6. QA the shopper path on mobile—most fashion traffic is phone-first.
7. Pilot on 20–30% of SKUs with the worst return history; compare after 2–4 weeks.
At LOOKSY, script installs can take minutes; a full Telegram Mini App catalog may take up to about a week.
Photo & data requirements

Background: white or solid light; no lifestyle clutter.
Angles: front mandatory; back nice-to-have for launch.
Files: JPG/PNG, ideally ≥1000×1000 px.
Data: each image tied to a SKU; size chart in a structured table for size recommendations.
CMS notes: Tilda, WordPress, Bitrix
Principle is the same: inject the snippet on the product template. Tilda: HTML block or site-wide body code. WordPress/WooCommerce: header/footer plugin or child theme single-product.php. Bitrix: catalog.element template—often a day for a Bitrix dev.
Measuring impact
Baseline before launch: PDP → add-to-cart CR, size-related return share, time on PDP, cart → purchase CR. Compare over comparable traffic for at least 2–4 weeks; 4–6 is better. Optional A/B: 50% with widget, 50% without.
Common mistakes

1. Launching on thousands of SKUs with mixed photo quality—start with 50–100 good shots.
2. No pre-launch analytics baseline.
3. On-model lifestyle photos instead of clean product shots—algorithms need a clear garment silhouette.
4. Hiding the try-on CTA—place it next to Add to cart with strong contrast.
5. Skipping mobile QA.
6. No event tracking after go-live.
7. Expecting lift in three days—allow a few weeks for usage to ramp.
FAQ
What is a virtual try-on widget?
An embeddable module that lets shoppers upload a photo (and often parameters) to see a generated preview and, with LOOKSY, a size hint—not just a static size chart.
What does implementation cost?
SaaS is usually per-generation or subscription; custom builds from scratch are far more expensive and slower. For 50–100 SKU pilots, pay-as-you-go SaaS keeps risk low.
Do I need developers?
For script widgets on typical CMS, often no. API or heavy custom stacks, yes.
Closing
Widget rollout is a finite checklist: photos, snippet, pilot SKUs, metrics. The main bottleneck is catalog readiness, not “AI magic”. If you want a guided setup, see looksy.tech or request a demo below.